
Mountain biking pushes your body to its limits. Whether you're climbing steep ascents or navigating technical descents, staying properly hydrated is crucial for maintaining performance and safety on the trail. The best hydration bladder for mountain biking makes this essential task effortless.
Performance Benefits
Proper hydration directly impacts your riding performance. Studies show that even mild dehydration (2% of body weight) can reduce power output by up to 30% and significantly impair cognitive function—critical when making split-second decisions on technical trails. A quality hydration bladder for mountain biking ensures you can drink regularly without stopping.
Safety Considerations
When riding remote trails, access to clean drinking water becomes a safety issue. A reliable hydration system with sufficient capacity means you won't cut your ride short or risk dehydration in isolated areas. The best hydration bladder for mountain biking keeps you self-sufficient and safe, regardless of ride duration or trail conditions.
Unlike traditional water bottles that require you to take your hands off the handlebars and eyes off the trail, hydration bladders feature convenient drinking tubes that allow you to sip while maintaining full control of your bike. This hands-free hydration is invaluable when navigating technical terrain where focus and balance are paramount.
Beyond Basics: Ride Enhancement
Modern hydration bladders for mountain biking are engineered specifically for the rigors of off-road cycling. They distribute weight evenly across your back, reducing fatigue during long rides. Many feature lumbar-specific designs that position water weight lower on your back, enhancing stability during technical descents. This thoughtful design integration sets specialized mountain biking hydration systems apart from general-purpose options.
Additionally, a quality hydration bladder eliminates the annoying "sloshing" sound that plagues bottle users—a small detail that enhances the natural experience many riders seek on the trails.
Top 5 Hydration Bladders for Mountain Biking
After extensive testing across varied terrain and weather conditions, these five hydration bladders stand out as the best hydration bladders for mountain biking in 2025. Each offers unique advantages for different riding styles and preferences.
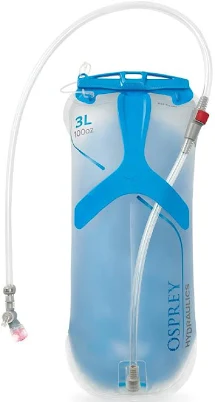
1 Osprey Hydraulics 3L Reservoir — Best Overall
Price: $50.00
The Osprey Hydraulics 3L Reservoir consistently outperforms the competition with its innovative design and unmatched reliability. The slide-lock opening system is significantly more user-friendly than traditional screw caps, making refilling and cleaning a breeze even with gloved hands on cold rides.
What I Love:
- Magnetic tube attachment keeps the bite valve accessible but secure
- Rigid backplate prevents the annoying "barreling" effect when packed in a bag
- QuickConnect system allows hose removal without emptying the reservoir
- High-flow bite valve delivers water quickly during intense efforts
- BPA-free construction with no plastic taste, even in hot weather
Pros
- Excellent durability
- Easy-fill slide top
- Secure magnetic clip
- No plastic taste
- Balanced weight distribution
Cons
- Premium price point
- Slightly heavier than minimalist options
- Slide lock requires practice
2 HydraPak Velocity 1.5L — Best Lightweight Option
Price: $38.00
When every gram counts, the HydraPak Velocity stands out as the best hydration bladder for mountain biking in the lightweight category. What sets this bladder apart is its incredible versatility—it can be turned inside out for thorough cleaning and is even dishwasher-safe, solving one of the biggest maintenance headaches of traditional reservoirs.
What I Love:
- Ultra-lightweight design at just 5.4 ounces (153g)
- Inside-out reversibility makes cleaning and drying effortless
- Flexible material that compresses as you drink, eliminating sloshing
- High-flow Blaster valve delivers 20% more water per sip
- Lifetime warranty against manufacturer defects
Pros
- Featherweight design
- Dishwasher safe
- No plastic taste
- Easy cleaning
- Dries quickly
Cons
- Smaller capacity options
- Less structured when full
- Zip top can be finicky
3 Gregory 3D Hydro Reservoir — Best Durability
Price: $52.95
The Gregory 3D Hydro Reservoir is engineered for mountain bikers who prioritize reliability above all else. With its reinforced construction and innovative 3D design, this bladder maintains its shape even when packed alongside other gear—an invaluable feature on all-day epics where pack space is at a premium.
What I Love:
- Integrated handle makes filling and handling remarkably easy
- Thick, soft polymer material resists punctures and abrasion
- Built-in drying hanger speeds maintenance between rides
- Push-button valve eliminates leaks when packed tightly
- Narrow profile fits seamlessly into hydration sleeves
Pros
- Superior durability
- Excellent handle design
- Integrated drying system
- Reliable valve mechanism
- No plastic taste
Cons
- Heavier than competitors
- Cannot be rolled up when empty
- Higher price point
4 Platypus Hoser — Best Value
Price: $29.99
The Platypus Hoser offers incredible performance at an accessible price point, making it the value champion among hydration bladders for mountain biking. Its minimalist design focuses on core functionality without unnecessary frills, resulting in remarkable reliability without breaking the bank.
What I Love:
- Ultralight design at just 4.2 ounces (119g) for the 3L size
- Silver-ion antimicrobial treatment inhibits bacteria growth
- Exceptionally durable film material resists punctures
- HyFLO self-sealing bite valve provides excellent water flow
- Simple design means fewer potential failure points
Pros
- Budget-friendly
- Exceptionally lightweight
- Great flow rate
- Taste-free material
- Durable construction
Cons
- No locking bite valve
- More difficult to clean
- Non-removable bite valve
5 USWE Shape-Shift Hydration Bladder — Best for Technical Terrain
Price: $41.99
For aggressive mountain bikers who tackle technical descents and jumps, the USWE Shape-Shift offers unmatched stability. Its innovative baffle system prevents water from sloshing during dynamic movements, maintaining your center of gravity and preventing distractions during critical moments on the trail.
What I Love:
- Internal baffle system eliminates water movement during aggressive riding
- Plug-N-Play connection allows easy tube disconnection
- Expandable design changes volume as you drink
- Leak-proof auto shut-off valve system
- Compatible with multiple pack systems
Pros
- No-bounce design
- Versatile compatibility
- Easy-disconnect system
- Self-sealing bite valve
- Great for jumps and drops
Cons
- Slight plastic taste initially
- More complex cleaning
- Heavier than minimalist options
User Reviews Summary
"After 5 years of using CamelBak, I switched to the Osprey Hydraulics and will never go back. The magnetic clip is genius, and I love how the rigid backplate keeps it from collapsing in my pack. Survived 30+ rides in Moab without a single leak." — MountainRider22 on Reddit
"The HydraPak Velocity changed my life when it comes to cleaning. Being able to turn it inside out and toss it in the dishwasher means no more funky taste or mold concerns. It's so light I barely notice it in my pack during long climbs." — Amazon Verified Purchase
"USWE Shape-Shift is a game-changer for technical riding. I used to hate the sloshing feeling when hitting jumps with my old bladder half-full. This completely eliminates that problem and keeps my balance point consistent. Worth every penny if you ride aggressive trails." — MTB-Forums user
Key Features to Look for in a Mountain Biking Hydration Bladder
When shopping for the best hydration bladder for mountain biking, several critical features determine whether a product will enhance or hinder your riding experience. Understanding these key elements will help you make an informed purchase decision based on your specific riding needs.
Capacity & Weight Considerations
Mountain bikers typically need between 1.5-3 liters of water, depending on ride duration, temperature, and intensity. Remember that water weighs approximately 2.2 pounds per liter, so consider this when balancing hydration needs against weight concerns.
For shorter rides (under 2 hours) in moderate temperatures, a 1.5L bladder is usually sufficient. For epic all-day adventures or hot conditions, a 3L reservoir provides essential hydration security. Many riders own multiple bladders in different sizes to match specific ride requirements.
While 3-liter bladders offer maximum capacity, consider that a full reservoir significantly impacts bike handling on technical terrain.
Filling & Closure Systems
The two predominant filling/closure systems each offer distinct advantages:
- Slide-top closures (as found on Osprey and HydraPak models) offer the widest opening for easy filling, ice addition, and cleaning. They typically create a watertight seal by folding and sliding a plastic bar across the opening.
- Screw-cap designs (common in CamelBak and some Platypus models) provide a reliable seal but offer a smaller filling port and can be harder to thread properly with cold or gloved hands.
For mountain biking specifically, slide-top closures generally offer superior functionality, as they allow for quick refills at water sources without removing the bladder from your pack—a significant advantage during races or group rides.
Pro tip: Look for models with handles near the filling port, which greatly simplifies the filling process while maintaining stability.
Tube & Bite Valve Design
The drinking system is your primary interaction point with any hydration bladder for mountain biking, making its design crucial for on-trail convenience:
- Tube diameter directly impacts flow rate. Wider tubes (typically 10-12mm) deliver more water per sip but add slight weight.
- Bite valve styles vary between manufacturers, with some requiring a firm bite to activate and others operating with minimal pressure. This is largely personal preference, though most mountain bikers prefer high-flow valves during intense efforts.
- Locking mechanisms prevent accidental leakage when the bladder is compressed in your pack. Push-pull, twist, and switch designs each have advocates, but any reliable locking system is essential for mountain biking.
- Quick-disconnect systems allow tube removal without emptying the reservoir—invaluable for cleaning or when transferring between different packs.
For mountain biking specifically, magnetic tube attachments (found on premium models like Osprey) keep the bite valve accessible on your chest strap without bouncing during technical sections.
Shape & Profile Considerations
The bladder's shape significantly impacts how it integrates with your riding pack and affects weight distribution on your back:
- Traditional vertical reservoirs are designed for standard hydration sleeves in mountain biking packs. These work well for most trail and all-mountain riding.
- Lumbar-specific bladders (like CamelBak's Crux Lumbar) position weight lower on your back, enhancing stability during aggressive descents and jumps. These are gaining popularity among enduro and gravity-oriented riders.
- Low-profile designs maintain a flatter shape when full, preventing the "barreling" effect that can make packs uncomfortable and bulky.
For technical mountain biking, consider models with baffles or internal dividers that prevent water from sloshing dramatically as you navigate rough terrain. This feature becomes increasingly important for longer backcountry rides where stability is essential.
Materials & Durability
Mountain biking subjects gear to significant stresses, making durability a prime consideration for hydration bladders:
- Thermoplastic Polyurethane (TPU) offers excellent durability while remaining flexible and resistant to bacteria growth. Most premium bladders use food-grade TPU.
- Polyethylene (PE) is commonly used in budget options. While lighter, it's generally less durable and more prone to developing taste issues.
- Antimicrobial treatments help prevent bacteria and mold growth between uses—particularly valuable for mountain bikers who might leave a bladder in their pack between weekend rides.
For mountain biking specifically, prioritize puncture resistance and reinforced seams, as these areas face the greatest stress when packed alongside tools and spare parts. Many premium hydration bladders for mountain biking now include antimicrobial treatments in both the reservoir and tube to prevent "funk" from developing.
Maintenance & Cleaning Ease
Even the best hydration bladder for mountain biking can develop mold and bacteria if not properly maintained. Cleaning ease should be a primary consideration:
- Wide openings allow for easier hand cleaning and faster drying.
- Reversible designs (like HydraPak's) can be turned inside-out for thorough cleaning and rapid drying.
- Dishwasher-safe materials offer convenience for deep cleaning sessions.
- Drying hooks or integrated hangers speed the drying process between rides.
- Removable tubes enable thorough cleaning of all components.
For mountain bikers who ride frequently, cleaning ease becomes particularly important to maintain hygienic hydration without spending excessive time on maintenance. Modern designs like the HydraPak and Gregory models offer significantly improved cleaning convenience compared to older bladder designs.
Winter Considerations for Cold-Weather Mountain Bikers
For riders who venture out in freezing temperatures, specialized insulated bladders or tubes are worth consideration. Standard hydration systems can freeze quickly in sub-freezing conditions, making specialized options like insulated hydration bladders a worthwhile investment. Look for:
- Neoprene tube insulation sleeves
- Integrated tube heaters for extreme conditions
- Bladders with insulated sleeves
- Bite valve covers that prevent freezing at the drinking point
These features ensure reliable hydration during winter fat biking or cold-weather mountain biking adventures.
How to Clean and Maintain Your Hydration Bladder
Proper maintenance ensures your hydration bladder for mountain biking remains safe, functional, and taste-free for years. Following these protocols will extend the lifespan of your investment while preventing potentially harmful bacteria and mold growth.
Daily Quick-Clean Protocol
After every ride, implement this simple routine to prevent issues from developing:
- Empty completely: Drain any remaining water and squeeze the air out.
- Rinse with warm water: Fill halfway with warm (not hot) water, close, and shake vigorously.
- Flush the tube: Hold the reservoir above the bite valve and squeeze water through the entire tube system.
- Air dry: Hang with the opening down and bite valve open in a well-ventilated area.
This basic maintenance takes less than two minutes but prevents 90% of the common problems mountain bikers experience with hydration systems.
Hanging your bladder in direct sunlight occasionally can provide additional antimicrobial benefits, but limit exposure to prevent UV degradation of materials.
Deep Cleaning (Weekly or Monthly)
For thorough sanitization, perform these steps after several rides or whenever you notice any taste changes:
- Disassemble completely: Separate the tube, bite valve, and any other removable components.
- Clean with mild soap: Use fragrance-free dish soap and warm water. Avoid antibacterial soaps, which can affect taste.
- Scrub interior: Use a specialized reservoir brush or a clean bottle brush to reach all surfaces.
- Clean the tube: Thread a reservoir cleaning kit brush or pipe cleaner through the entire length of the tube.
- Sanitize: Create a solution of 2-3 tablespoons of baking soda in 1 liter of water. Fill the reservoir and tube system, let sit for 30 minutes, then rinse thoroughly.
- Dry completely: Use a reservoir drying rack or improvise with kitchen utensils to prop the reservoir open. Ensure the tube hangs straight to drain completely.
For dishwasher-safe models like the HydraPak, place components on the top rack for an effortless deep clean.
Dealing with Persistent Problems
Eliminating Mold
If you discover mold growing in your hydration bladder (usually appearing as black spots), take immediate action:
- Create a solution of 1/4 cup white vinegar and 1/4 cup baking soda in warm water
- Fill the reservoir and tube system, allowing it to foam
- Let sit for 30 minutes, then scrub all surfaces
- Rinse repeatedly until all traces of vinegar taste are gone
For severe cases, consider a commercial cleaning product specifically designed for hydration reservoirs, such as CamelBak Cleaning Tablets.
Removing Persistent Tastes
For stubborn flavors (especially after using sports drinks):
- Fill with warm water and add 1-2 teaspoons of unscented bleach
- Let sit for 30 minutes (no longer)
- Rinse thoroughly at least five times
- Follow with a baking soda rinse to neutralize any remaining bleach
- Air dry completely
Only use bleach as a last resort, and never on colored bladders or those with specific antimicrobial coatings.
Long-Term Storage
For the off-season or extended periods without use:
- Clean thoroughly and dry completely
- Store in the freezer (prevents microbial growth)
- Alternatively, store with a clean paper towel inside to absorb moisture
- Keep away from direct sunlight and heat
Always re-clean before using after long-term storage, regardless of how well it was cleaned before storing.
While most hydration bladders for mountain biking are remarkably durable, bite valves and connection points eventually wear out. Most manufacturers sell replacement parts, allowing you to extend the life of your reservoir indefinitely rather than replacing the entire system.
Trail Maintenance Tip
Always carry a small tube brush in your trail maintenance kit. If your tube clogs during a ride (particularly when using electrolyte drinks), this tool can clear blockages quickly. For multi-day adventures, pack a few cleaning tablets—they weigh almost nothing but can salvage a funky bladder at a backcountry campsite.
My Personal Experience with Hydration Bladders on the Trails
After 12 years of mountain biking across everything from bone-dry desert singletrack to humid rainforest trails, I've developed strong opinions about what makes the best hydration bladder for mountain biking. My experiences have shaped not just my preferences, but my entire approach to on-trail hydration.
The Leaky Lesson: Why Quality Matters
My hydration journey began with a budget bladder that failed catastrophically during a backcountry ride in Moab. Six miles from the trailhead, the seam split, drenching my spare clothes and leaving me without water in 95-degree heat. What should have been an epic day turned into a survival exercise, forcing me to cut the ride short and head back before dehydration became dangerous.
That experience taught me that saving $20 on a hydration system isn't worth the risk. I immediately invested in a premium bladder (the Osprey Hydraulics) that has now survived five years of abuse without a single failure. While the upfront cost was higher, the per-ride cost has proven insignificant compared to the reliability gained.
Seasonal Adaptations: One Bladder Doesn't Rule Them All
Living in Colorado means I experience dramatic seasonal variations in riding conditions. Through trial and error, I've discovered that different seasons demand different hydration approaches:
- Summer heat: I use a 3L insulated bladder that keeps water cooler for hours, critical when temperatures exceed 90°F. The additional weight is worth the performance benefit of cold hydration.
- Spring/Fall: A standard 2L reservoir provides the perfect balance of capacity and weight for moderate temperatures.
- Winter fat biking: I switch to a specialized insulated system with a neoprene tube cover to prevent freezing in sub-freezing conditions.
Rather than seeking a one-size-fits-all solution, I've found that maintaining a small collection of purpose-specific bladders maximizes my enjoyment across all riding conditions.
The Flow Rate Factor: A Pro's Advice
During a guided trip in Whistler, our local guide (a former professional downhill racer) shared advice that transformed my hydration approach. He emphasized that flow rate—how quickly water delivers when you need it—matters more than most riders realize.
"When you're riding at your limit, you need water immediately without breaking focus," he explained. "If you have to suck hard or stop pedaling to get a drink, you'll hydrate less frequently and performance will suffer."
After implementing his recommendation to upgrade to a high-flow valve system, I found myself naturally drinking more frequently during intense sections—precisely when my body needed it most. My endurance noticeably improved, especially during long climbs in hot weather.
Learning from Mistakes: The Cleaning Chronicles
I'll admit it: I've grown mold in hydration bladders more than once. The worst incident happened after a muddy spring ride when I tossed my pack in the garage and forgot about it for two weeks. When I finally opened it, the bladder had developed alarming black spots and smelled terrible.
After multiple cleaning attempts failed to resolve the problem, I consulted a local outdoor gear repair specialist who offered this wisdom: "Prevention is exponentially easier than cure." He recommended the quick rinse protocol I now follow religiously after every ride.
For mountain bikers who might not ride daily, I strongly recommend removing the bladder from your pack after each outing. Leaving it in creates a perfect dark, damp environment for mold growth, especially if your pack has absorbed sweat or gotten wet during the ride.
Ranger-Approved Trail Tip
During a volunteer trail maintenance day, a National Forest ranger shared a brilliant tip for backcountry riders: freeze your bladder half-full the night before a hot ride, then top it off with water in the morning. The ice block keeps your water cold for hours longer than starting with room temperature water.
This technique has been a game-changer for my summer desert rides. Just be sure your bladder is approved for freezing—most premium models are, but check manufacturer recommendations first.
The most important lesson from my years of mountain biking hydration experience? Don't compromise on quality when it comes to your hydration system. Water is your most essential trail companion, and a reliable delivery system for that water should be considered fundamental safety gear, not an accessory where corners can be cut.
Common Problems and How to Fix Them
Even the best hydration bladder for mountain biking can develop issues over time. Understanding how to diagnose and remedy common problems will extend the life of your investment and prevent trail disasters. Here are practical solutions to the most frequent hydration system challenges:
Leak Detection and Repair
Problem: Seeping from Connection Points
Symptoms: Moisture around tube connections, damp spots in pack
Solution:
- Disconnect and thoroughly dry all connection points
- Check O-rings for damage or misalignment
- Apply food-grade silicone lubricant to gaskets
- Reconnect, ensuring proper alignment and firm connections
If leaking persists, replacement O-rings cost just a few dollars and restore like-new performance.
Problem: Punctured Reservoir
Symptoms: Obvious leaking from reservoir body
Solution:
- For field repair, apply a small piece of duct tape to both the inside and outside of the puncture
- For permanent repair, use a specialized bladder repair kit with food-safe adhesive
- Allow 24 hours for the repair to cure before filling
- Test with air pressure before adding water
Most manufacturers offer replacement reservoirs if damage is beyond repair.
Flow Issues and Blockages
Problem: Reduced Flow Rate
Symptoms: Difficult to draw water, requires excessive suction
Solution:
- Check for kinks in the tube and reposition if necessary
- Inspect the bite valve for proper operation and clean if needed
- Blow air back through the tube to clear potential partial blockages
- Ensure the bladder isn't collapsed against the back of your pack, blocking water flow
Consider a rigid backplate bladder like the Gregory 3D Hydro if collapse is a recurring issue.
Problem: Complete Blockage
Symptoms: No water flow despite full reservoir
Solution:
- Disconnect the tube from the reservoir
- Flush with warm water from both directions
- Use a small tube brush or pipe cleaner to dislodge blockages
- For stubborn clogs (often from sports drink residue), soak in warm water with baking soda
Prevention: When using electrolyte mixes, flush with clean water immediately after your ride.
Taste and Odor Issues
Problem: Plastic Taste in New Bladders
Symptoms: Chemical or plastic flavor in water
Solution:
- Fill with warm water and add 2 tablespoons of baking soda
- Let soak overnight, then rinse thoroughly
- Fill with fresh water and add a squeezed lemon
- Let sit for 1-2 hours, then rinse
Most modern hydration bladders for mountain biking use taste-free materials, but this treatment speeds up the breaking-in process.
Problem: Musty or Moldy Smell
Symptoms: Unpleasant odor, potential visible mold spots
Solution:
- Mix 2-3 tablespoons of bleach in 1 liter of water
- Fill reservoir and tube with solution
- Let sit for 30 minutes (no longer)
- Rinse thoroughly at least five times
- Follow with baking soda solution to neutralize any remaining bleach
If odors persist after this treatment, replacement may be necessary as mold can become embedded in microscopic cracks in the material.
Cold Weather Challenges
Problem: Tube Freezing
Symptoms: No water flow despite squeezing reservoir
Solution:
- After each sip, blow air back into the tube to clear water
- Keep the tube inside your jacket between drinks
- Add a neoprene insulation sleeve over the tube
- For extreme conditions, consider a specialized winter hydration system with tube insulation
In temperatures below 20°F (-7°C), even insulated tubes may freeze. Consider insulated hydration bladders with advanced protection for these conditions.
Problem: Valve Freezing
Symptoms: Bite valve hard or impossible to use
Solution:
- Store the valve inside your jacket between sips
- Use a bite valve cover to trap body heat
- In emergency situations, warm the valve with your hands
Remember to fully close your valve lock in cold conditions to prevent leakage if the valve partially freezes in the open position.
When to Replace Your Hydration Bladder
Even with perfect maintenance, hydration bladders have a finite lifespan. Consider replacement if:
- Persistent taste issues remain despite thorough cleaning
- Materials show signs of degradation (cloudiness, brittleness, or stiffness)
- Repeated leaks occur despite repairs
- Bite valve no longer maintains proper tension
- Interior surfaces show signs of delamination
Most quality hydration bladders for mountain biking should last 3-5 years with regular use and proper maintenance. Many manufacturers offer excellent warranty programs—check your specific model's coverage before discarding a problematic bladder.
Conclusion
Finding the best hydration bladder for mountain biking isn't simply about purchasing the most expensive option—it's about matching your specific riding style with the right hydration system. Through extensive testing and real-world experience, I've found that the ideal bladder varies depending on ride duration, terrain type, weather conditions, and personal preferences.
The Osprey Hydraulics 3L stands as my overall recommendation for most mountain bikers due to its outstanding balance of durability, user-friendly design, and reliable performance across varied conditions. Its innovative slide-lock opening and magnetic tube attachment specifically address the unique needs of off-road cyclists.
For weight-conscious riders who prioritize minimal pack weight, the HydraPak Velocity offers exceptional performance at a remarkably low weight penalty. Its reversible design solves the cleaning challenges that plague many traditional bladders, while the high-flow valve ensures adequate hydration during intense efforts.
Budget-conscious riders should strongly consider the Platypus Hoser, which delivers reliable performance at a significantly lower price point than premium options. While it lacks some conveniences like a quick-disconnect hose or locking bite valve, its fundamental reliability and lightweight design make it an excellent value proposition.
Remember that proper maintenance dramatically extends the lifespan of any hydration system. The quick rinse protocol outlined in this guide requires minimal time investment but prevents most common issues from developing. For mountain bikers who use electrolyte mixes or ride in varied weather conditions, developing consistent cleaning habits is particularly important.
Whichever model you choose, the most important factor is that it facilitates consistent hydration during your rides. The best hydration bladder for mountain biking is ultimately the one that becomes such a natural extension of your gear that you hardly notice it—until that crucial moment when you need water to power through a challenging section or recover from an intense climb.
Stay hydrated, ride strong, and enjoy the trails!
Related Resources
- For general hydration needs: Best Hydration Bladder: Complete Guide
- For hiking-specific options: Best Hydration Bladder for Hiking
- For runners: Best Hydration Bladder for Running: Bounce-Free Options
- For overnight adventures: Best Hydration Bladder for Backpacking
- For cold weather activities: Best Insulated Hydration Bladder: Winter Guide
- For minimal weight: Best Lightweight Hydration Bladder: Ultralight Options
- For female-specific fit: Best Hydration Bladder for Women
- For wilderness water: Best Hydration Bladder with Filter: Clean Water Anywhere
- For maximum capacity: Best 3-Liter Hydration Bladder: High-Capacity Options
- For budget options: Best Budget Hydration Bladder: Affordable Quality
Frequently Asked Questions
How much water should I carry while mountain biking?
The amount of water you should carry depends on several factors: ride duration, temperature, intensity, and available refill points. As a general guideline, most riders need approximately 0.5-0.75 liters per hour in moderate conditions. For hot weather, increase this to 0.75-1 liter per hour.
For a typical 2-3 hour ride in moderate conditions, a 2-liter bladder provides sufficient hydration for most riders. For all-day epics or rides in extreme heat, a 3-liter capacity offers necessary security. When in doubt, it's always better to carry slightly more water than you think you'll need—the weight penalty is minimal compared to the performance and safety impacts of dehydration.
Can I put sports drinks in my hydration bladder?
Yes, most modern hydration bladders for mountain biking can accommodate sports drinks, but with important caveats. Electrolyte mixes and sports drinks provide valuable nutrition during longer rides but require more diligent cleaning afterward.
If using sports drinks in your bladder:
- Clean thoroughly immediately after your ride
- Pay special attention to the tube and bite valve, where residue tends to accumulate
- Consider dedicated bladders for water and sports drinks to prevent taste contamination
- Avoid sugar-heavy mixes which promote bacterial growth and are harder to clean
Many riders prefer to carry plain water in their bladder and supplement with a bottle containing electrolytes, giving them both options during the ride while simplifying cleaning.
How do I prevent my hydration bladder from freezing in cold weather?
Preventing freezing requires a multi-layered approach for winter mountain biking:
- Start with warm water in your reservoir (not hot, which can damage materials)
- Use an insulated bladder or add an insulating sleeve to retain heat
- Insulate the tube with a neoprene cover (the tube freezes long before the reservoir)
- Blow air back into the tube after each sip to clear water from the tube
- Keep the bite valve under a layer between uses
- Consider a chest-mounted system that leverages your body heat
For extreme cold (below 20°F/-7°C), specialized winter hydration systems with battery-heated tubes are available, though these add considerable weight and complexity.
How do I know what size hydration bladder will fit in my pack?
Most mountain biking packs are designed to accommodate standard hydration bladders, but compatibility isn't universal. To determine the appropriate size:
- Check manufacturer specifications for your pack's hydration capacity
- Measure the hydration sleeve in your pack (height, width, and depth)
- Consider the shape—some packs are designed for vertical reservoirs, others for lumbar-specific designs
- Look for attachment points that may limit certain bladder designs
Most standard mountain biking packs accommodate 2-3 liter bladders, but compact race packs may only fit 1.5 liter options. When in doubt, slightly undersize your bladder rather than forcing a too-large reservoir that could stress seams or create uncomfortable pressure points against your back.
Are hydration bladders safe from a health perspective?
Modern hydration bladders for mountain biking from reputable manufacturers are made from food-grade materials that are BPA-free and phthalate-free. These materials are specifically designed for safe, taste-free hydration.
The primary health concern isn't the materials themselves but potential bacterial growth if the bladder isn't properly cleaned and dried. Following proper cleaning protocols after each use prevents harmful microorganism development.
If you're particularly concerned about material safety, look for bladders specifically labeled as BPA/BPS-free with FDA-approved food-grade materials, such as those from Osprey, HydraPak, and CamelBak.